Integrate CCM19 into Jimdo: How to activate the cookie banner
With CCM19, you can ensure that your Jimdo website is GDPR-compliant and that visitors can actively decide on cookies. The integration is uncomplicated and can be done in just a few steps.
Does your website have a GDPR problem? Check now for free!
How high is the risk of fines for your website? Enter your website address now and find out which cookies and third-party services pose a risk
Step 1: Create a CCM19 account and generate code
Before you start, you need an individual CCM19 code for your website. If you do not yet have a CCM19 account, you can register here free of charge. The free plan is permanently free!
After registering, enter your domain in the CCM19 dashboard and start onboarding your website. After the setup, you will be provided with the required code snippet.
Step 2: Paste the code into the Jimdo header area
These instructions only apply to Jimdo Creator, as the <head> area can be edited in this system.
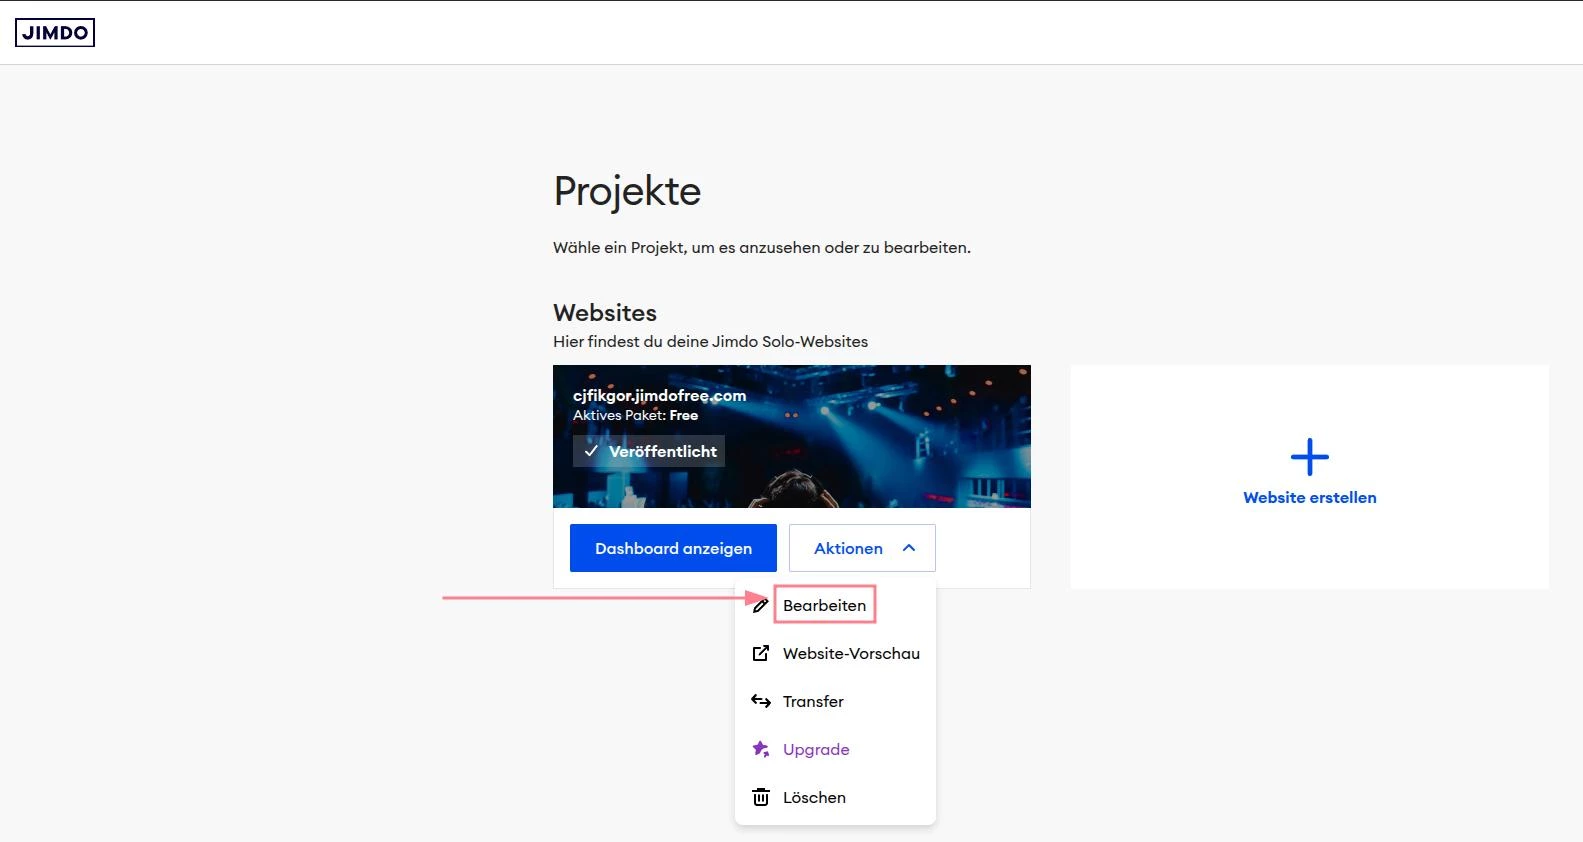
- Open your Jimdo dashboard and select your project and click on "Actions" and then "Edit".
- Click on the menu at the top left and go to Settings.

- Select the item "Edit head".

- An editor will open - insert the CCM19 code here. Place it at the beginning of the area so that the cookie banner is loaded correctly.
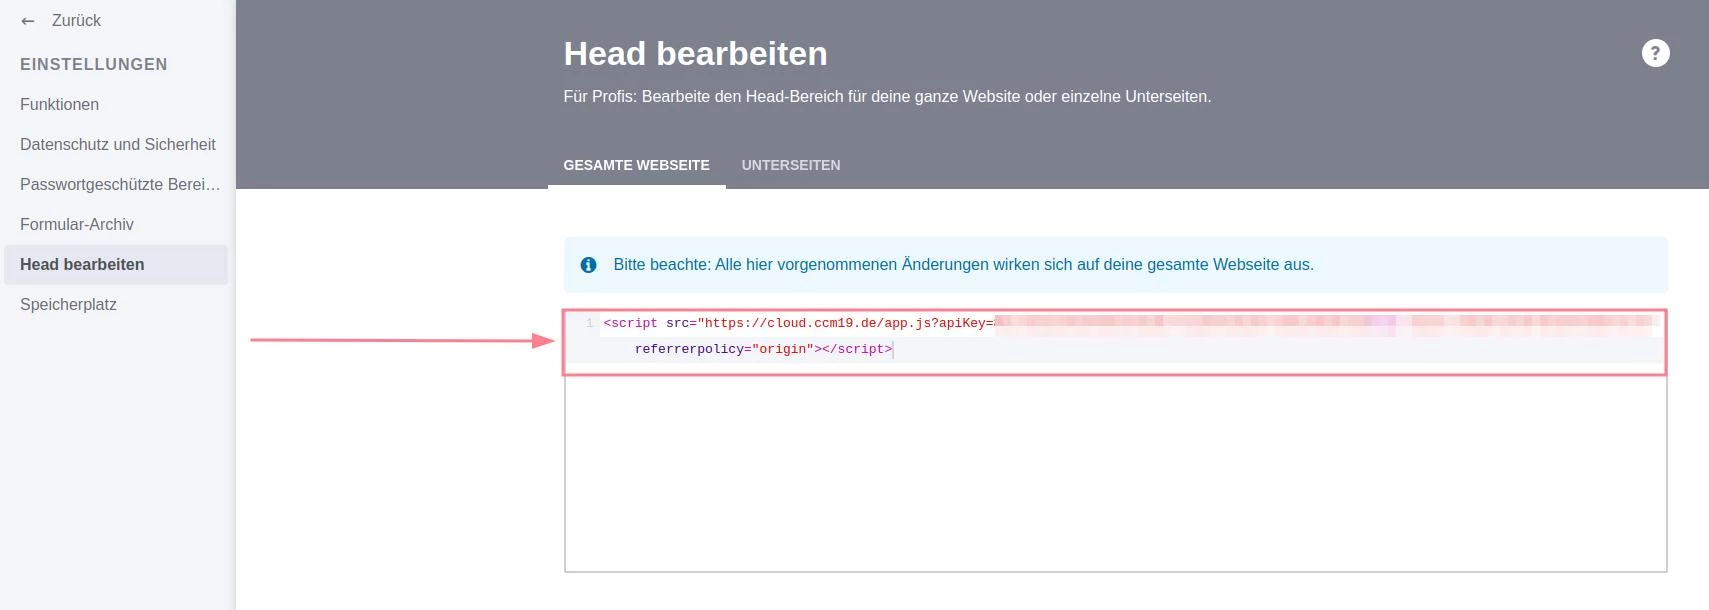
- Save the changes.
Step 3: Perform a function test
After saving, the cookie banner should be directly visible on your website. If not, refresh the page and check the integration again.
Further questions?
Our support team will be happy to help you - by phone or via our live chat. With us, you talk to real people, not bots!
With these steps, your Jimdo project is optimally prepared for GDPR-compliant use.
Does your website have a GDPR problem? Check now for free!
How high is the risk of fines for your website? Enter your website address now and find out which cookies and third-party services pose a risk
Cookie banner - comprehensively explained
As a website operator, you must provide a cookie banner to c... » weiter
